Discord for a GitHub Classroom - Part 1
GitHub App Basics
04/26/2020
15 Minutes to Read
[nodejs javascript github auth graphql This post explains how to get started with making your own GitHub app for a GitHub organization! There are two primary components: the GitHub application and the code application. The former represents an entity recognizable by GitHub, and the latter is what is performing tasks using the GitHub API.
As I began to write this post, I made a snap decision to reevaluate how my current app worked. I originally coded it against GitHub’s REST API v3. This worked mostly well for what I needed so far, but in some corner cases it was a little less than ideal. Being the newbie that I am with these sorts of interfaces I thought nothing of it when I started writing my app. However, I came to learn about GitHub’s GraphQL API v4. I am ultra-new to GraphQL having only looked at it for the first time just a few days ago, but I have already converted the handful of functions in my app to use it and it performs a good bit better.
Other Articles in this Series
- Part 0 - Background & Motivation
- Part 1 - GitHub App Basics (you are here!)
GitHub App
First, we need to run through a few steps to create a new app in GitHub that we will install into our organization. For this first part you need to have permissions over an organization that allows you to install an app.
Creating the App
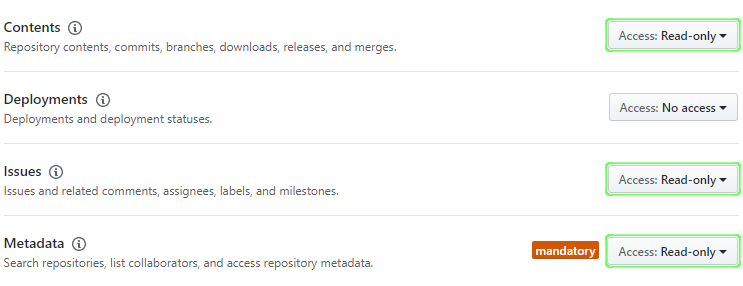
To get started we are going to follow the directions provided by GitHub for creating a new app. In addition to those instructions we want to disable webhooks and specify the following permissions:
We can change all of this later; this is all we need to get started. I currently only plan on having my app available to my organization, and so I also chose to keep the final option (where the app can be installed) set to “only on this account”. That is all that needs to be configured for now, so click Create GitHub App.
Generate a Private Key
For our code to communicate with GitHub, we need a way for it to authenticate as the GitHub app. After creating the app, you should be redirected to its settings page; at the bottom you can find the settings for generating a private key.

Selecting the “Generate a private key” button will prompt you to save a file. This file is the private key! You want to save this file in a secure location where it will not be lost/deleted (though you can always make a new one as needed). You do not want to share this file or upload it anywhere! This is the key to your app, anyone that has it can authenticate as your app and with some additional metadata can access everything the app can. Do not share this file!
Installing the App
Lastly before we get into some code, you want to install the app into your organization. From the app’s settings page, there should be an option on the left-side panel “Install App”. Clicking into that should give you the option to install your app into your organization. This will prompt you to confirm how you want to install it: for all repos or select ones. I plan on giving access to all my repos here, so I am going to select “All repositories”. Once you confirm the installation, we are set!
Node.js
Now we will set up Node.js to create our app.
Installation
Head over to nodejs.org to download an installer for your system. Once it is installed on your system and node and npm are on your system path you can continue.
Create a new directory for your app. In this directory we will create a new project:
npm init
This will prompt you for some information about your project and save into a file package.json (feel free to skip some of the prompts if you wish). We also need to install some useful libraries for working with GitHub’s GraphQL API v4:
npm install @octokit/auth-app @octokit/graphql @octokit/request
These libraries come from octokit; auth-app handles (go figure) authenticating our app, and graphql handles API communication. The request package is used for handling some things that graphql does not handle. In future versions of that package I would expect some analog to exist for these features.
Writing Code for our App
Now that we have our application configured in GitHub it is time that we write some code that will act as our application!
Getting the Installation ID
In order to properly authenticate as our app, we need to recognize that in some cases a single app could be installed across many organizations. This means that we need to be able to reference a specific installation of our app; we do this using the installation ID. This ID is not readily available through GitHub’s UI, and so we need to write a little bit of code to get it.
Here is the final script we will use to retrieve the installation ID:
// Step 1
const fs = require('fs');
const { createAppAuth } = require("@octokit/auth-app");
const { request } = require("@octokit/request");

// Step 2
var privateKey = fs.readFileSync("./myapp.2020-04-26.private-key.pem", 'utf8');

// Step 3
const auth = createAppAuth({
    id: 12345,
    privateKey: privateKey,
})

// Step 4
auth({ type: "app" }).then(x => {
    // Step 5
    request("GET /app/installations", {
        headers: {
            authorization: `Bearer ${x.token}`,
            accept: "application/vnd.github.machine-man-preview+json",
        },
    }).then(console.log)
})
Let us quickly break this down before we analyze the output.
- Step 1: Import a few packages:
fsto read our private key,octokit/auth-appfor authenticating, andoctokit/requestfor making a REST call. - Step 2: Read the content of the private key file we downloaded earlier; replace the path here with the path to your key!
- Step 3: Create an auth object for our app. Note the
idfield; this is your app’s ID and can be found on the settings for your app (the same page where we created the private key) - Step 4: Authenticate as an app using our information; this is an async call! This most importantly returns a JWT (JSON web token) that we need to use to authenticate as.
- Step 5: Make a request to get all the installation data for your app and log the output (again, it is another async call here)
The output from step 4 (if you wanted to log it) should look something like:
{
  type: 'app',
  token: 'thisisyourjwtandwilllooklikegarbagio',
  appId: 12345,
  expiresAt: '2020-04-26T20:34:42.000Z'
}
Note the expiresAt field; your token will automatically expire! The output from step 5 should look something like:
{
  status: 200,
  url: 'https://api.github.com/app/installations',
  headers: {
    // redacted for brevity
  },
  data: [
    {
      id: 67890,
      account: [Object],
      repository_selection: 'all',
      access_tokens_url: 'https://api.github.com/app/installations/67890/access_tokens',
      repositories_url: 'https://api.github.com/installation/repositories',
      html_url: 'https://github.com/organizations/NESWare/settings/installations/67890',
      app_id: 12345,
      app_slug: 'nesware',
      target_id: 1,
      target_type: 'Organization',
      permissions: [Object],
      events: [],
      created_at: '2020-04-26T19:03:08.000Z',
      updated_at: '2020-04-26T19:03:08.000Z',
      single_file_name: null
    }
  ]
}
The important piece here is the id field under the first (and currently only) element of data. This is the installation ID we need for authenticating the rest of our calls. The data field is an array of all installations of our app; if we had more installations, then we would need to dive a little deeper into the account field of each installation to find a specific organization.
Keep note of the installation ID, we will need it for the next section!
Using GraphQL to Get Data
The final stretch! With our app configured and installed in GitHub and our installation ID retrieved, we can now write a basic script to get some information using GraphQL! Let us create a new file for our script; here is the final script we will use.
// Step 1
const fs = require('fs');
const { createAppAuth } = require("@octokit/auth-app");
const { graphql } = require("@octokit/graphql");

// Step 2
var privateKey = fs.readFileSync("./myapp.2020-04-26.private-key.pem", 'utf8');

// Step 3
const auth = createAppAuth({
    id: 12345,
    installationId: 67890,
    privateKey: privateKey,
})

// Step 4
const graphqlWithAuth = graphql.defaults({
    request: {
        hook: auth.hook
    }
});

// Step 5
organization = "NESWare"
var query = `{
    organization(login: "${organization}") {
        repositories(first: 10, privacy: PUBLIC) {
            nodes {
                name
                url
            }
        }
    }
}`;

// Step 6
graphqlWithAuth(query).then( result => {
    console.log( result.organization.repositories.nodes )
})
Again, let us break this down before we analyze the output.
- Steps 1, 2 and 3: These are pretty much the same as before. Note however that we include the
installation IDalong with our token. - Step 4: Hook our authentication into the GraphQL request; from here we can just use
graphqlWithAuthas our requester. - Step 5: Write a GraphQL query to get all public repositories of your organization. More on this below.
- Step 6: Perform the request and print the output; this is an async call!
The output should show the repositories of your organization that are specifically public. Here is some sample output:
{
    name: 'NESWare.github.io',
    url: 'https://github.com/NESWare/NESWare.github.io'
}
GraphQL Queries
Let us take a quick look at the query we used to get all our organization’s public repositories:
{
    organization(login: "NESWare") {
        repositories(first: 10, privacy: PUBLIC ) {
            nodes {
                name
                url
            }
        }
    }
}
Here we are constructing a query to give us a very specific set of data: from the organization whose name (login) is “NESWare” give me the name and URL of the first 10 public repositories. This is very succinct and gives us exactly what we are asking for, no more and no less. You may be asking, what if I have more than 10 repositories? How can I just get all of them? The GitHub API enforces a limit of 100 records, so you could just request the first 100 repositories. And if you have more than 100 repositories? You will need to rely on paging, but that is information for a later article.
If you are excited to poke around, check out the GraphQL Explorer that GitHub provides; this tool lets you construct queries and retrieve real production data. It is a fantastic tool for learning the API and for validating your queries.
Conclusion
Our basic app is done! We can do an absolute ton from here; the possibilities are nearly endless once you begin to realize what you want to do with the information. Mind you, we only gave our app some basic read-only permissions over repositories and issues; the GraphQL API v4 is extensive and continuously growing and improving; there is so much we can do!
All code can be found on GitHub here.